Use the Solution
Using the System
Okay, now that everything is set up, we’ll try using the system with three different roles to see how it works.
Three main roles
- Administrator - the highest level of permission
- Manager - creates templates and approves requests
- End user - requests accounts to use
It should take about 30 minutes to try them all.
Administrator Role
1. Logging into the system
- Get the URL from the CloudFrontDistributionUrl saved during deployment
- Open the URL in a browser
- Log in with the admin account. The first time, select Forgot password to set it up.
Note: If you see two tabs, Accounts and Applications, select Applications to enter the main app.
2. Adding accounts for lease
- In the left navigation bar, Administration > Accounts
- Click Add accounts
- In Select accounts, you will see a list of available accounts. If there are none, check if the sandbox account has been moved to the Entry OU.
- Select a few accounts, Next, then Submit.
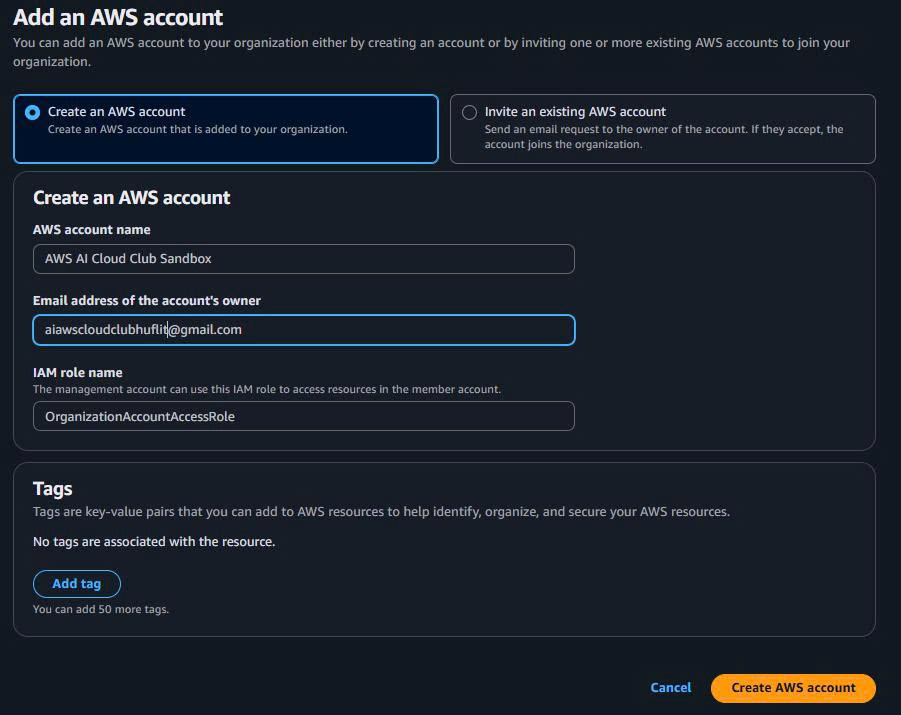
- Go back to Accounts to check the status.
3. Managing settings
- In the navigation bar, Administration > Settings
- There are three tabs:
- General Settings
- Lease Settings (default maximum budget is $100)
- Clean Up Settings
- To change these, you must use AWS AppConfig (explained in the next section).

4. Creating a Service Control Policy to set limits
Example: Create an SCP to prevent users from creating m5.large EC2 instances.
Steps:
- Log into the organization management account
- Open AWS Organizations
- In the navigation bar, select Policies
- Under Supported policy types > Service control policies
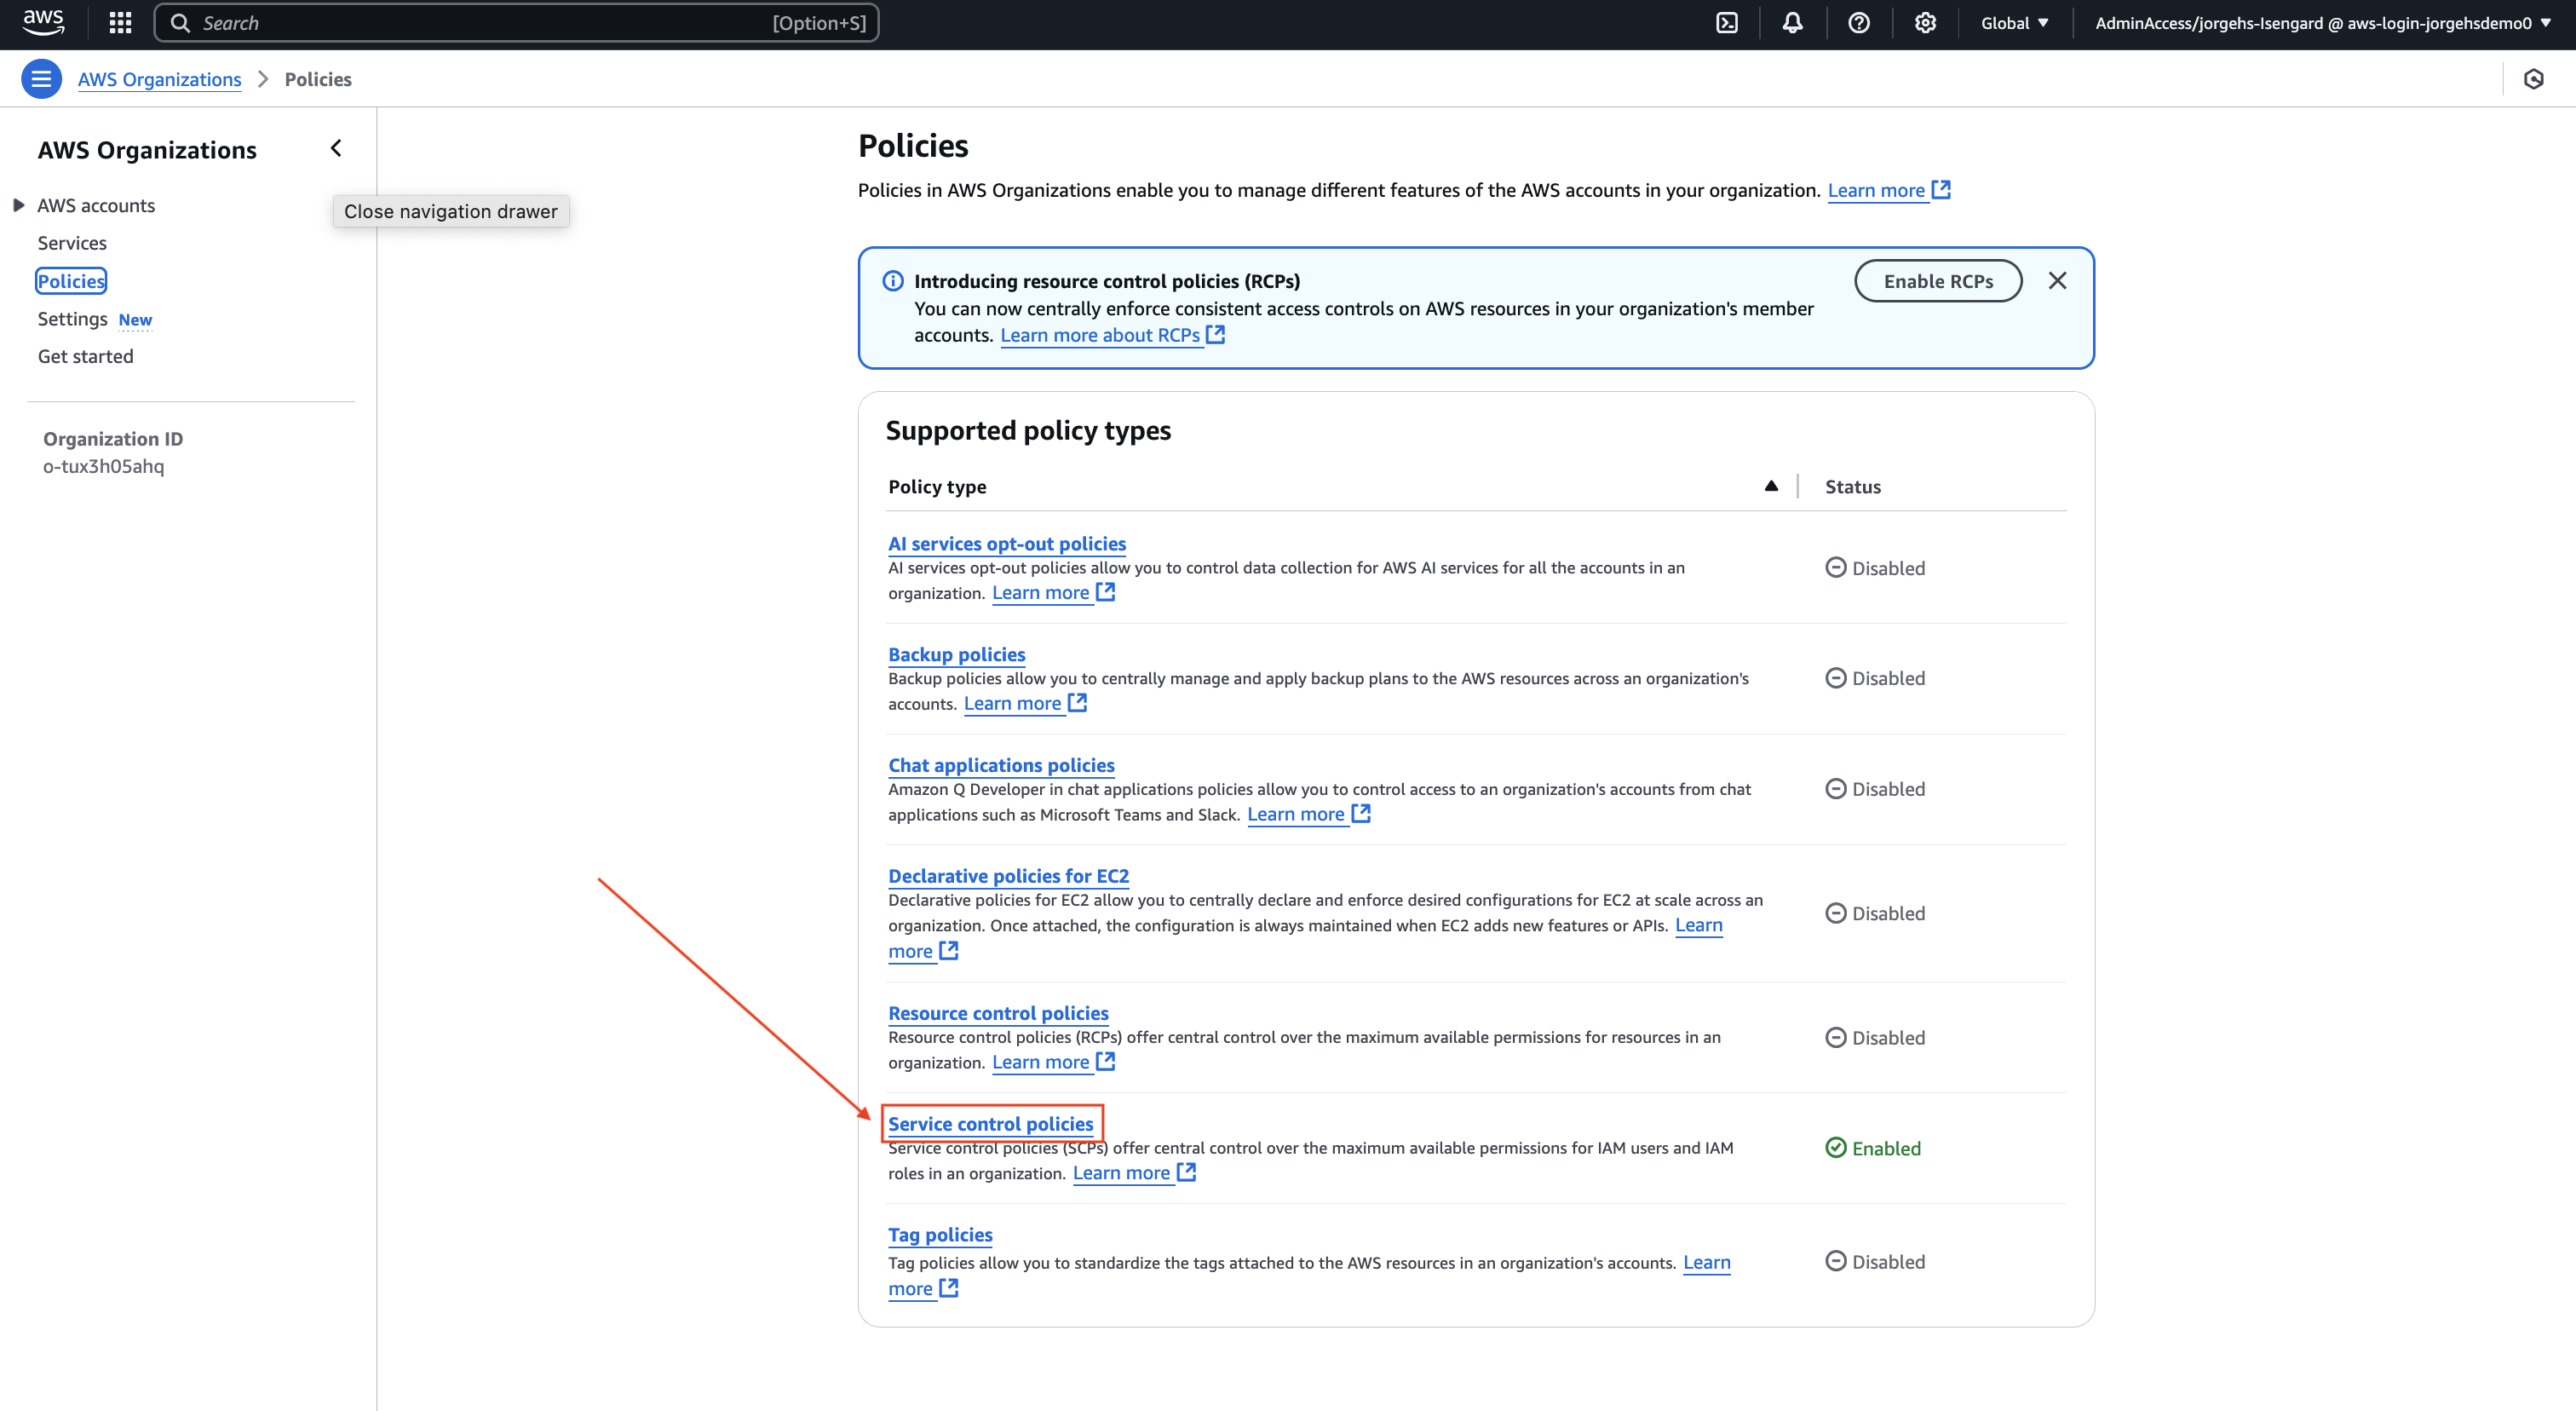
- Click Create policy:
- Policy name: RestrictEC2Instances
- Policy description: This SCP restricts launching certain EC2 instance types.
- Paste this JSON into the policy editor:
{
  "Version": "2012-10-17",
  "Statement": [
    {
      "Effect": "Deny",
      "Action": "ec2:RunInstances",
      "Resource": "arn:aws:ec2:*:*:instance/*",
      "Condition": {
        "StringEquals": {
          "ec2:InstanceType": [
            "m5.large"
          ]
        }
      }
    }
  ]
}
- Create policy
- Go back to Policies, select the newly created policy
- In the Targets tab, click Attach
- Select the OU named
your-namespace_InnovationSandboxAccountPool, Attach policy
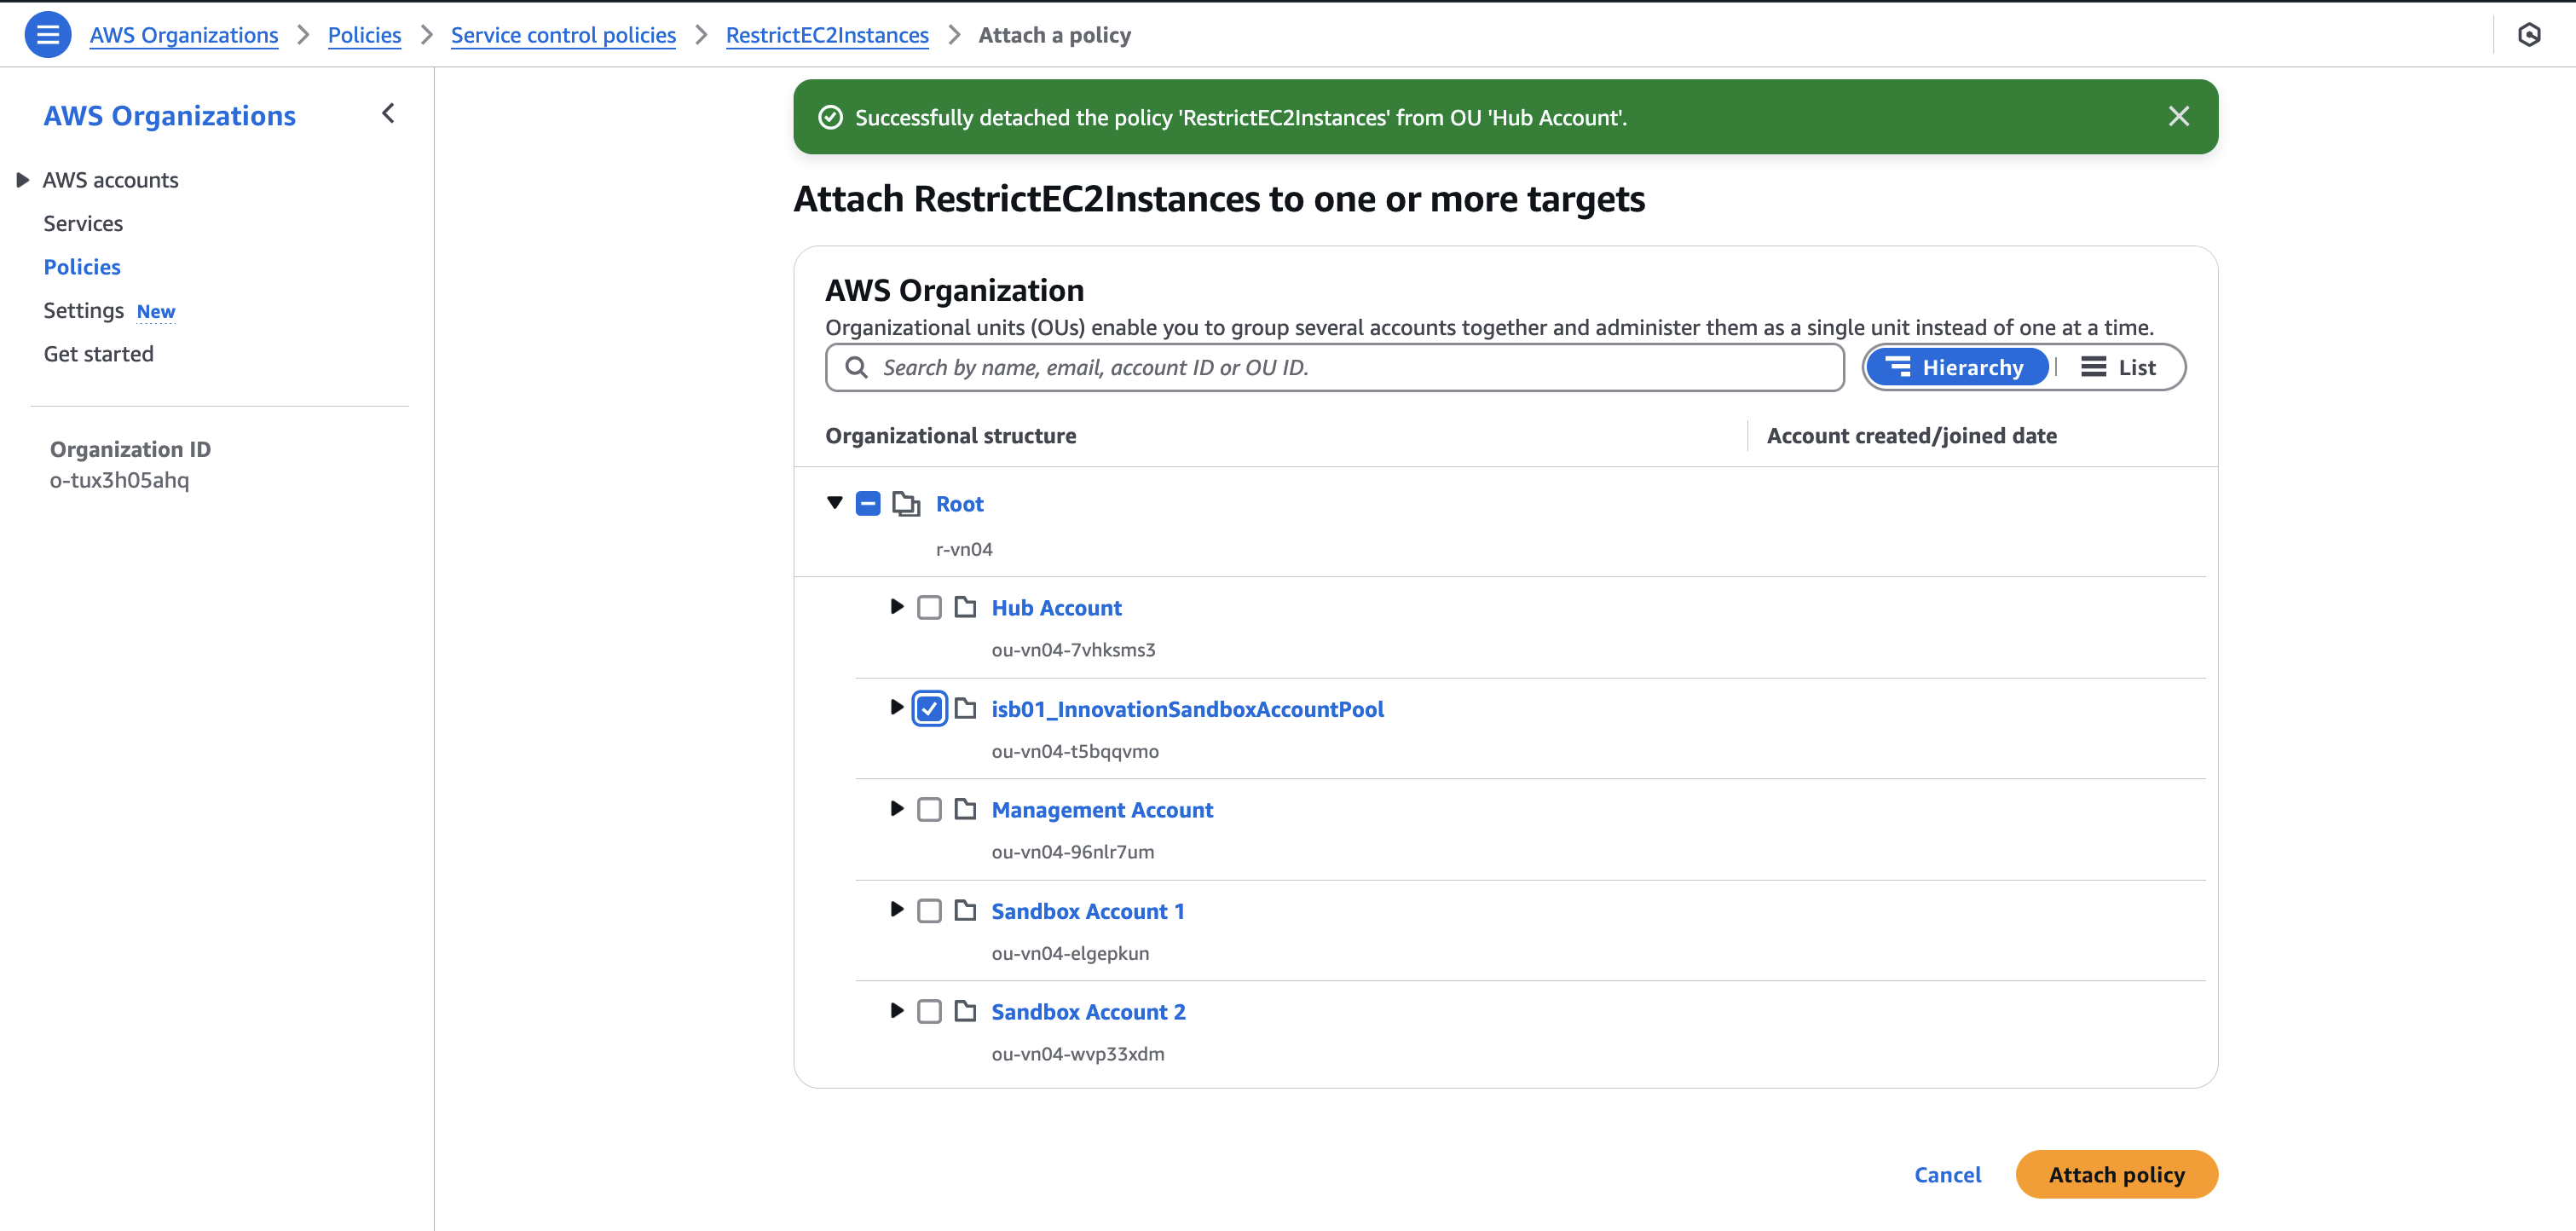
Result: Users in the sandbox account can no longer create m5.large EC2 instances.
Manager Role
The manager can edit settings and create templates for user account requests.
Editing settings with AppConfig
Important note: Do this in the hub account, not the management account. Use the correct home Region.
Steps:
- Log into the hub account
- In the console search bar, enter AWS AppConfig
- In the navigation bar, select Applications
- Select the created app
- Select InnovationSandboxData-Config-GlobalConfigHostedConfiguration-ID
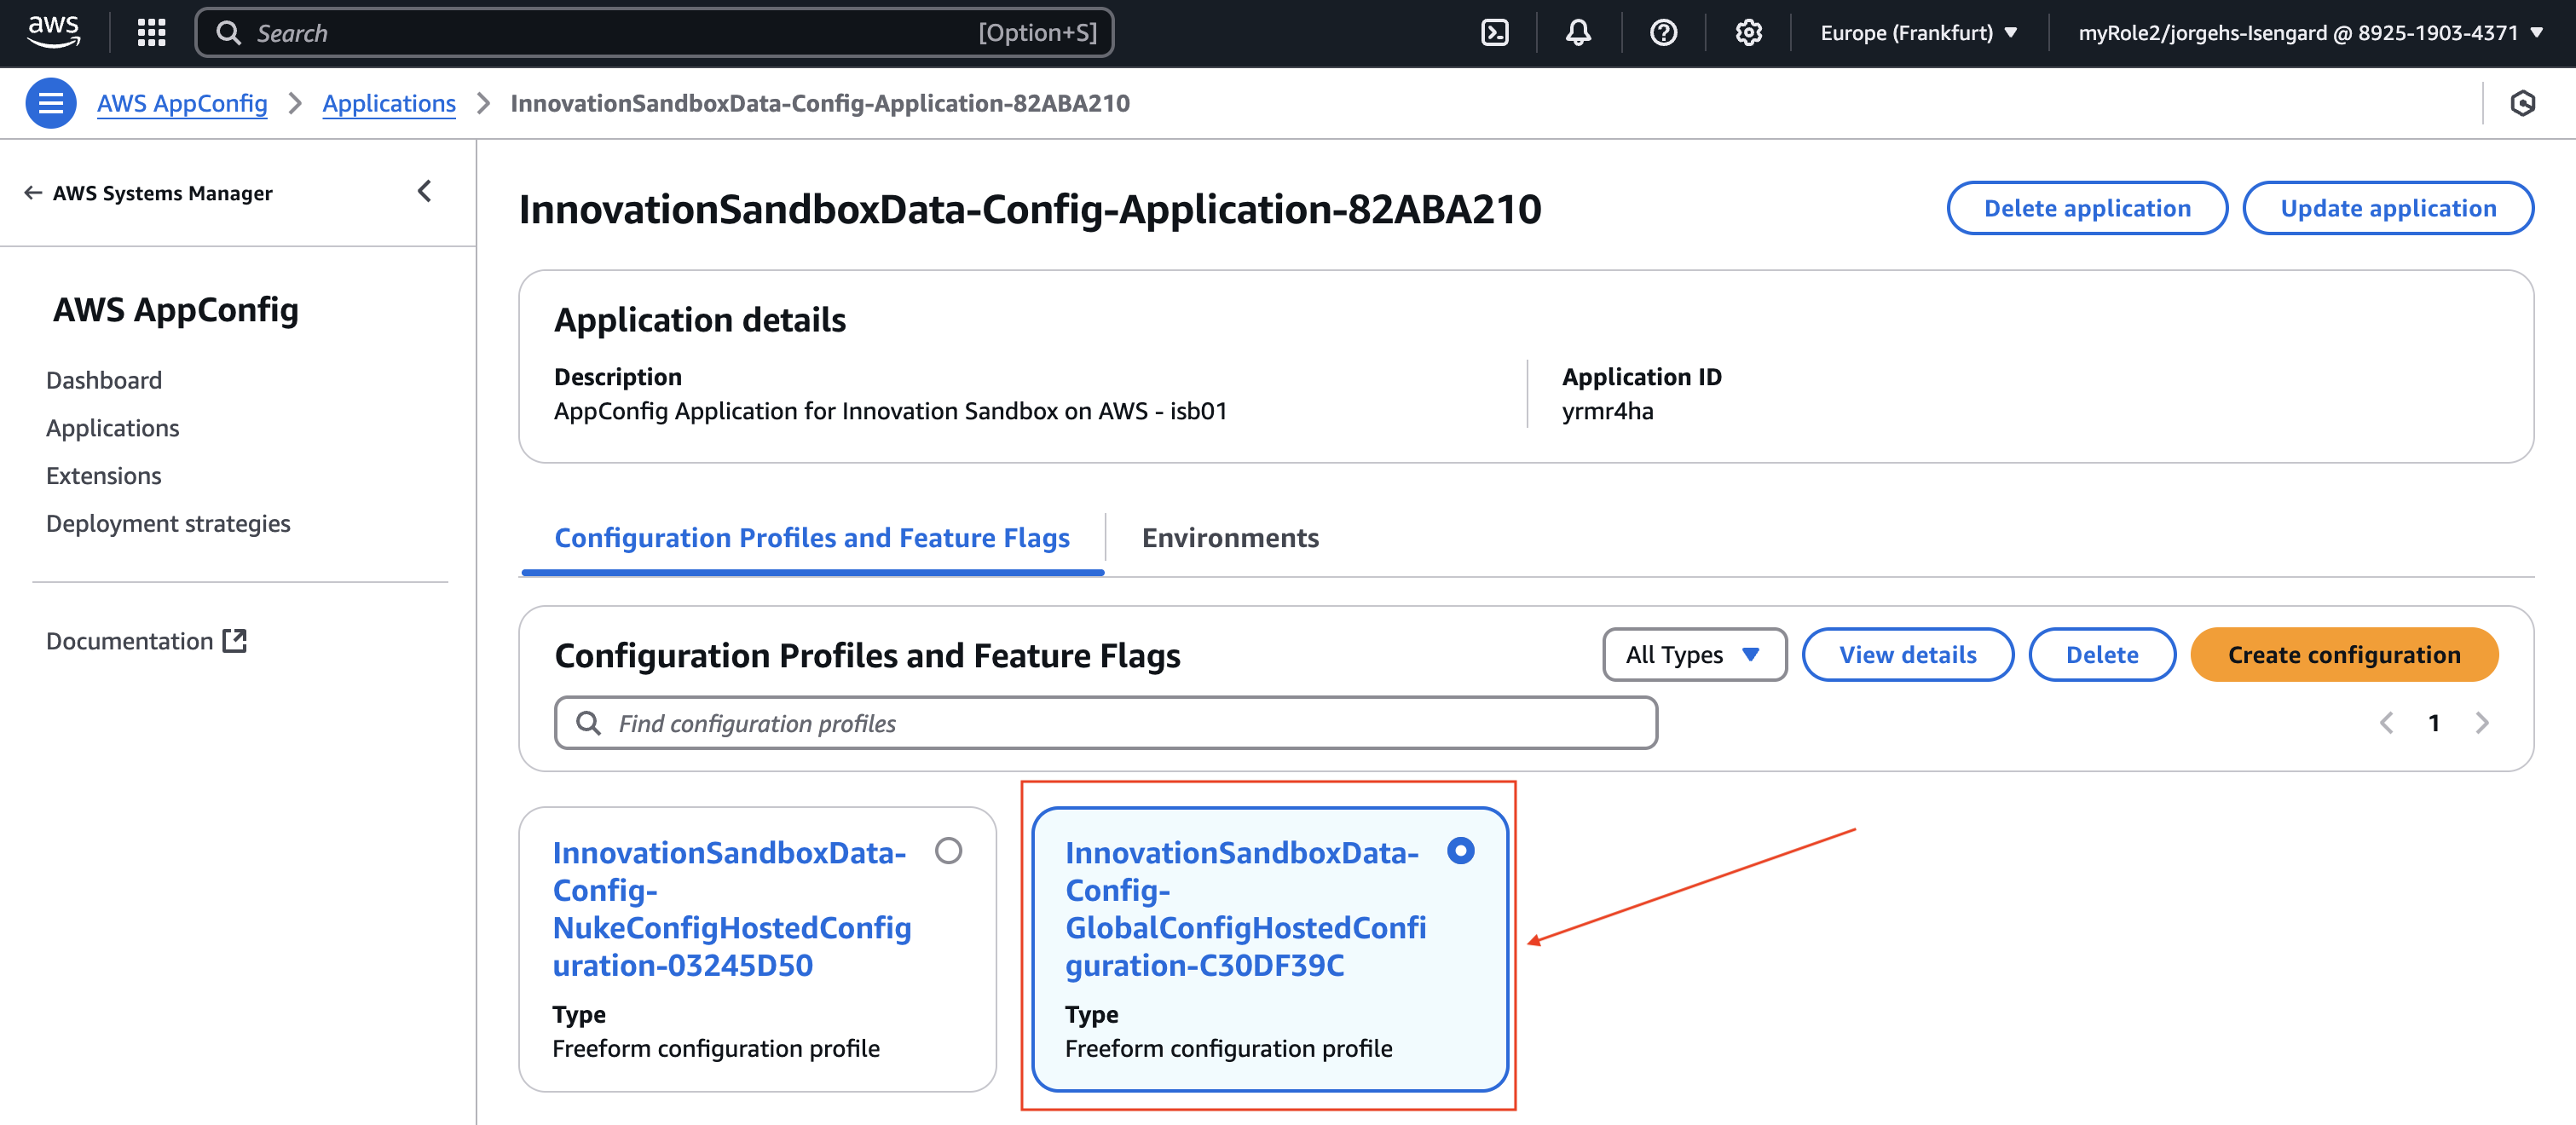
- Hosted configuration versions > Create
- Change maxBudget to 50 (USD)
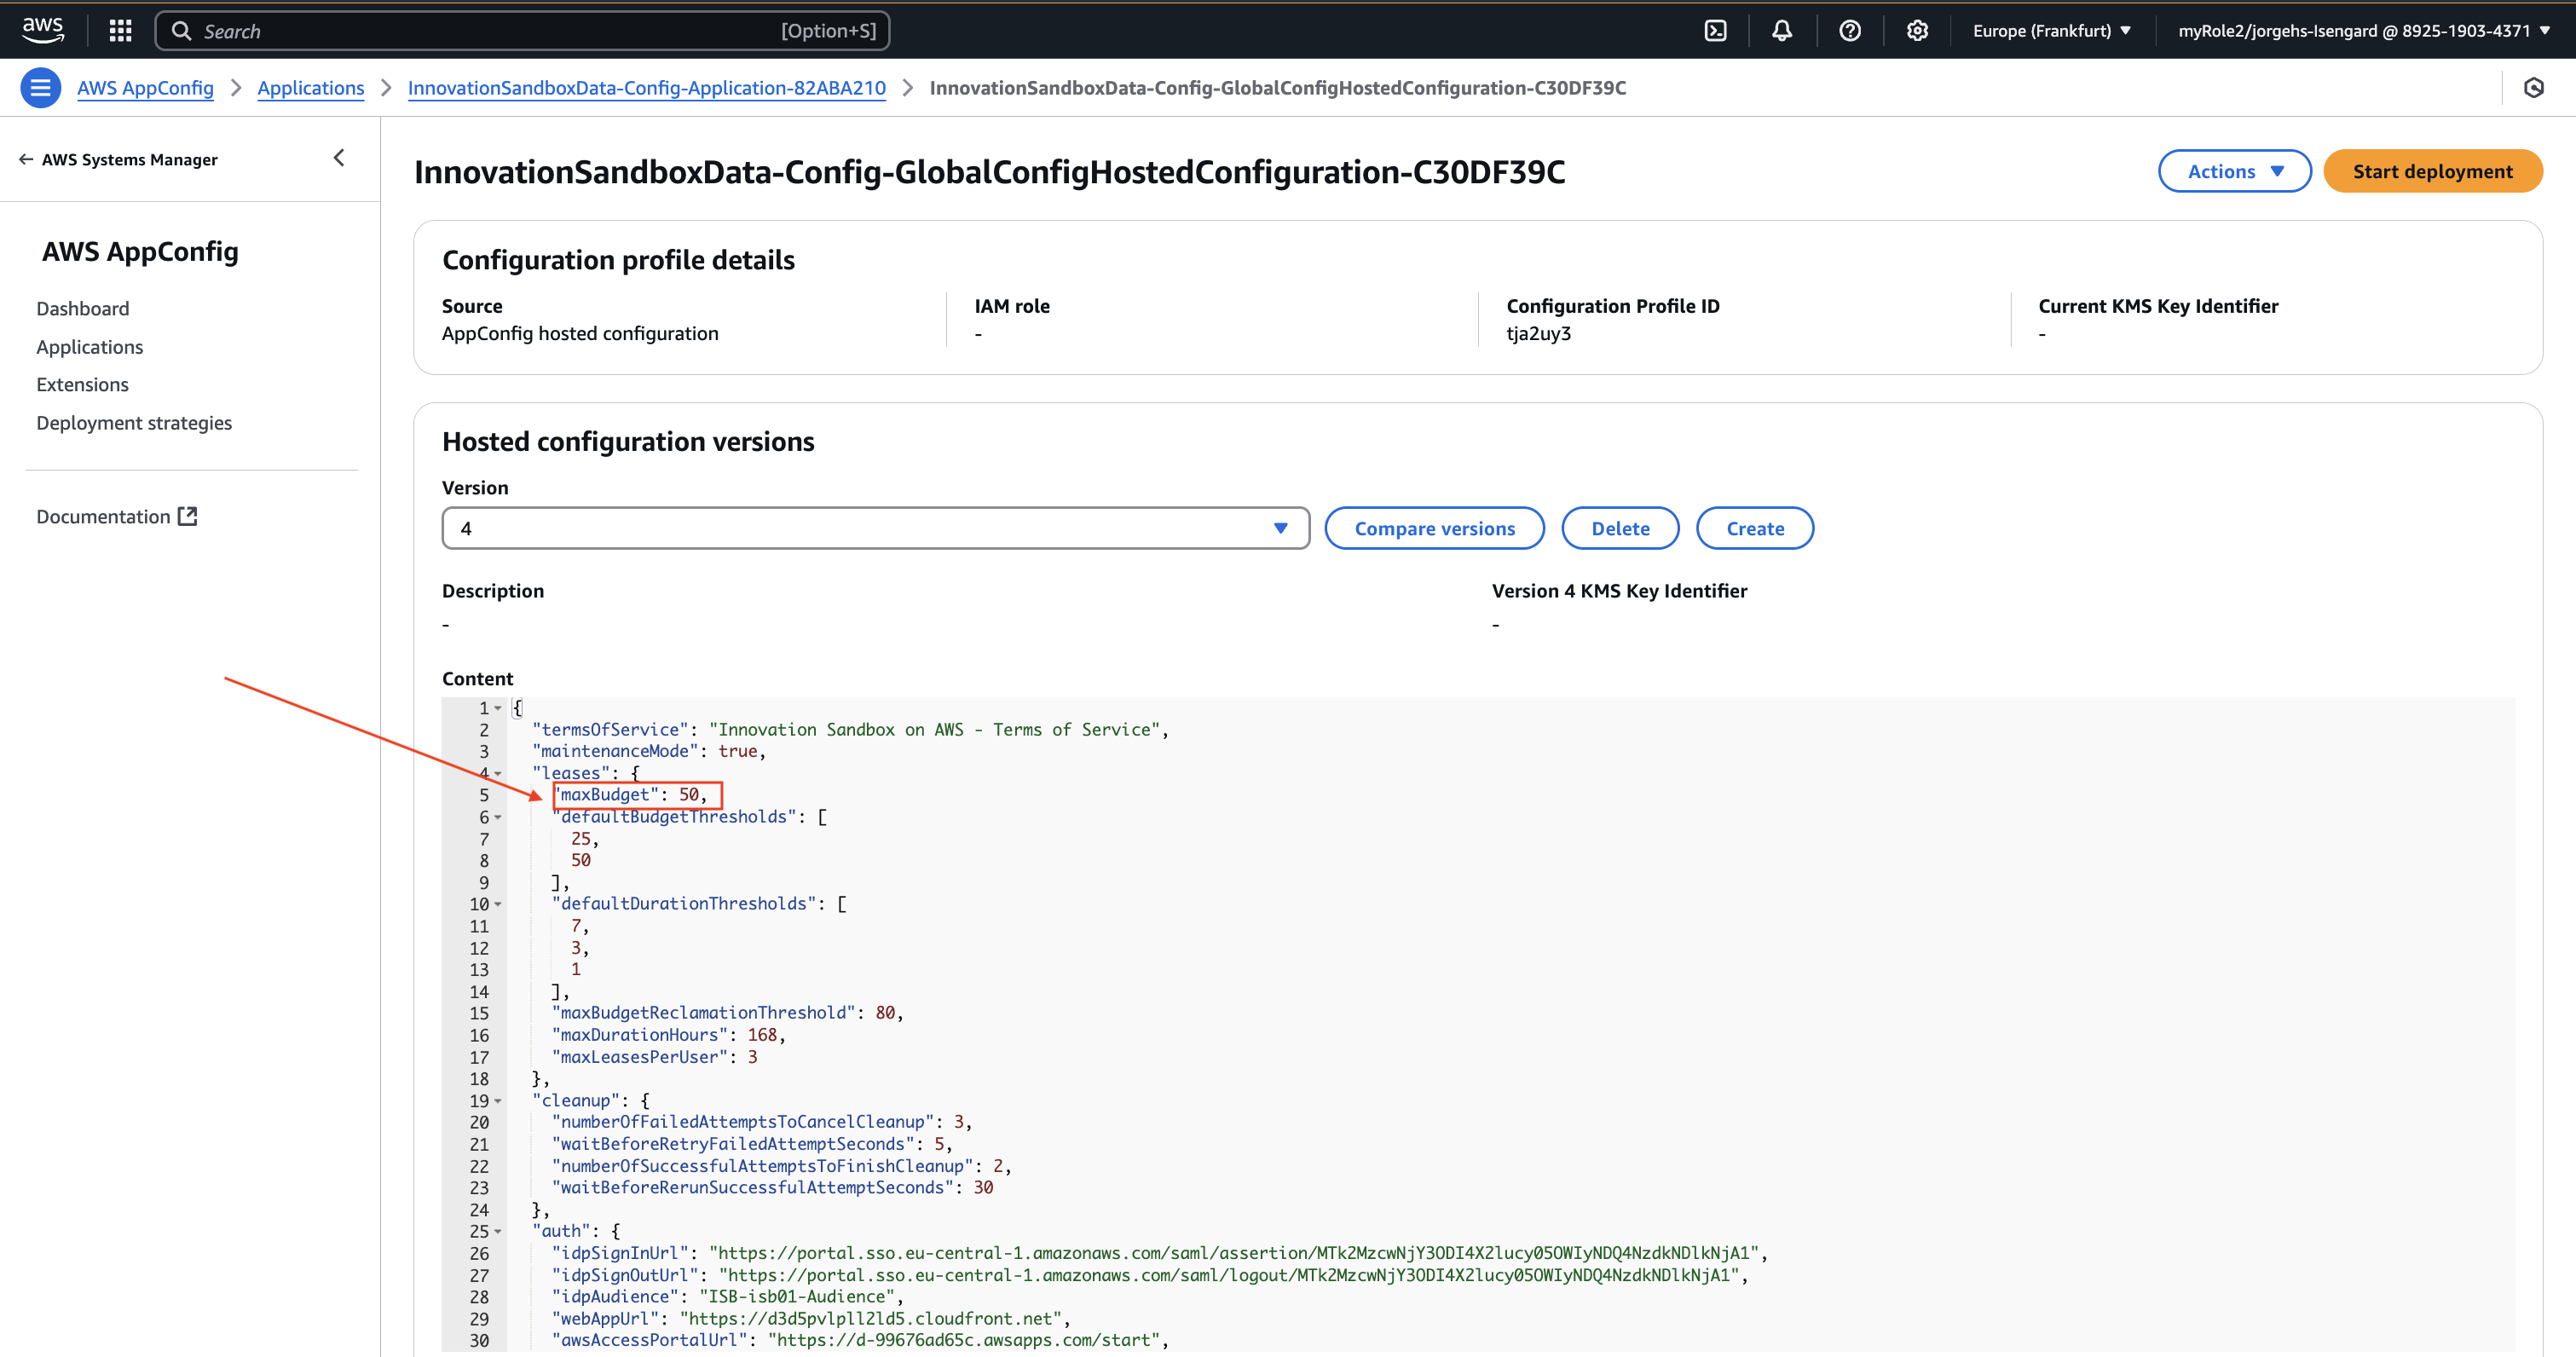
- Create hosted configuration version
- Start deployment
- Select the newly created version, keep the other settings, Start deployment
Creating Lease Templates
What is a Lease Template
Basically, it’s a set of rules defining how users can use resources:
- Maximum budget: How much they can spend
- Duration: How long they can use it
- Approval: Whether a manager needs to approve it
- Alerts: Notifications for when money or time is almost up
We’ll create two types:
- Basic: $25, auto-approved, for light testing
- Advanced: $50, needs approval, for larger projects
Creating a Basic Template
This template is for requests that don’t need approval. $25 maximum, alerts at $15, usable for 168 hours (1 week), with a 24-hour warning before expiration.
Steps:
- In the Innovation Sandbox console, select the profile in the top right > Sign out
- Log in with the manager account. Use Forgot password the first time.
- If there are two tabs, Accounts and Applications, select Applications.
- In the navigation bar, select Lease Templates.
- Add new lease template
- Name:
Basic - Description:
Basic account lease template - Uncheck Approval required (no manager approval needed)
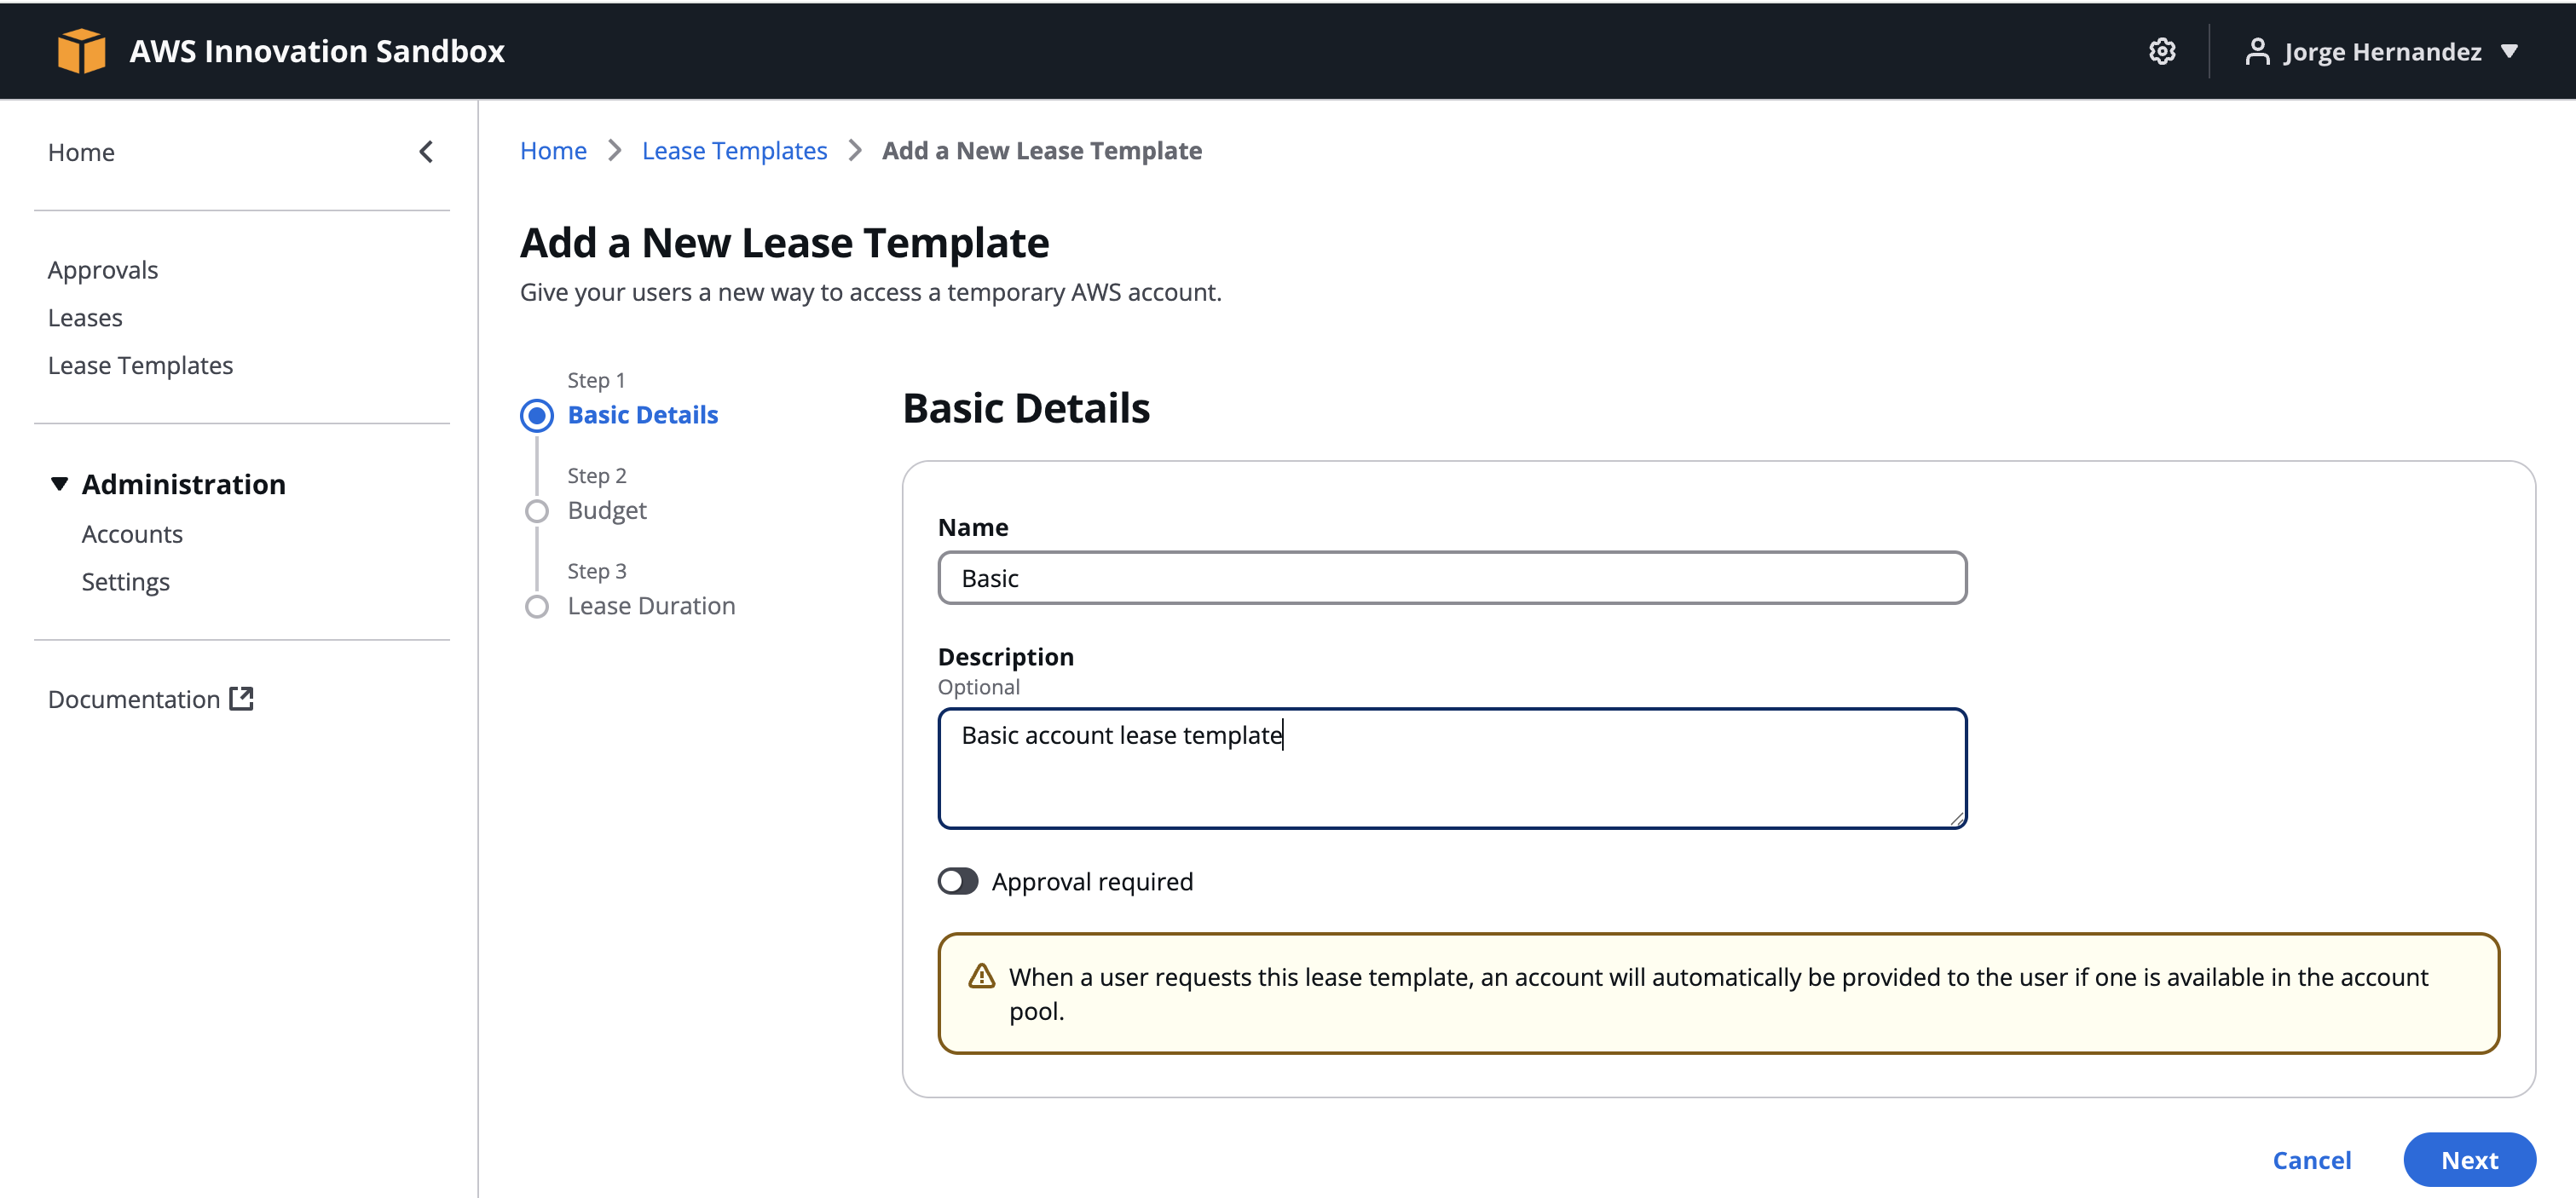
- Next
- Maximum budget:
100, Next - If AppConfig was set correctly, it will error, saying the max budget is $50. Change Maximum Budget Amount to
25. - Budget Thresholds > Add a threshold:
- amount consumed:
15 - action: Send Alert. The user will be alerted at $15, and the account will be deleted at $25.
- amount consumed:
- Next
- Maximum Duration > Set a maximum duration >
168 - Duration Thresholds > Add a threshold:
- remaining hours:
24 - action: Send Alert. A warning will be sent with 24 hours remaining.
- remaining hours:
- Submit

Creating an Advanced Template
This template requires manager approval. $50 maximum, alerts at $40, 168-hour duration, 24-hour warning.
Steps:
- Lease Templates > Add new lease template
- Name:
Advanced - Description:
Advanced account lease template - Keep Approval required checked
- Next
- Maximum budget:
50, Next - Budget Thresholds > Add a threshold:
- amount consumed:
40 - action: Send Alert
- amount consumed:
- Next
- Maximum Duration > Set a maximum duration >
168 - Duration Thresholds > Add a threshold:
- remaining hours:
24 - action: Send Alert
- remaining hours:
- Submit

End-User Role
Now let’s try being a regular user, requesting an account and using it.
1. Requesting a basic account
The basic account will be auto-approved.
Steps:
- In the Innovation Sandbox interface, select the profile in the top right > Sign out
- Log back in with the end user account
- If there are two tabs, select Applications
- Request a new account
- Select Basic lease template, Next
- Check I accept the above terms of service, Next
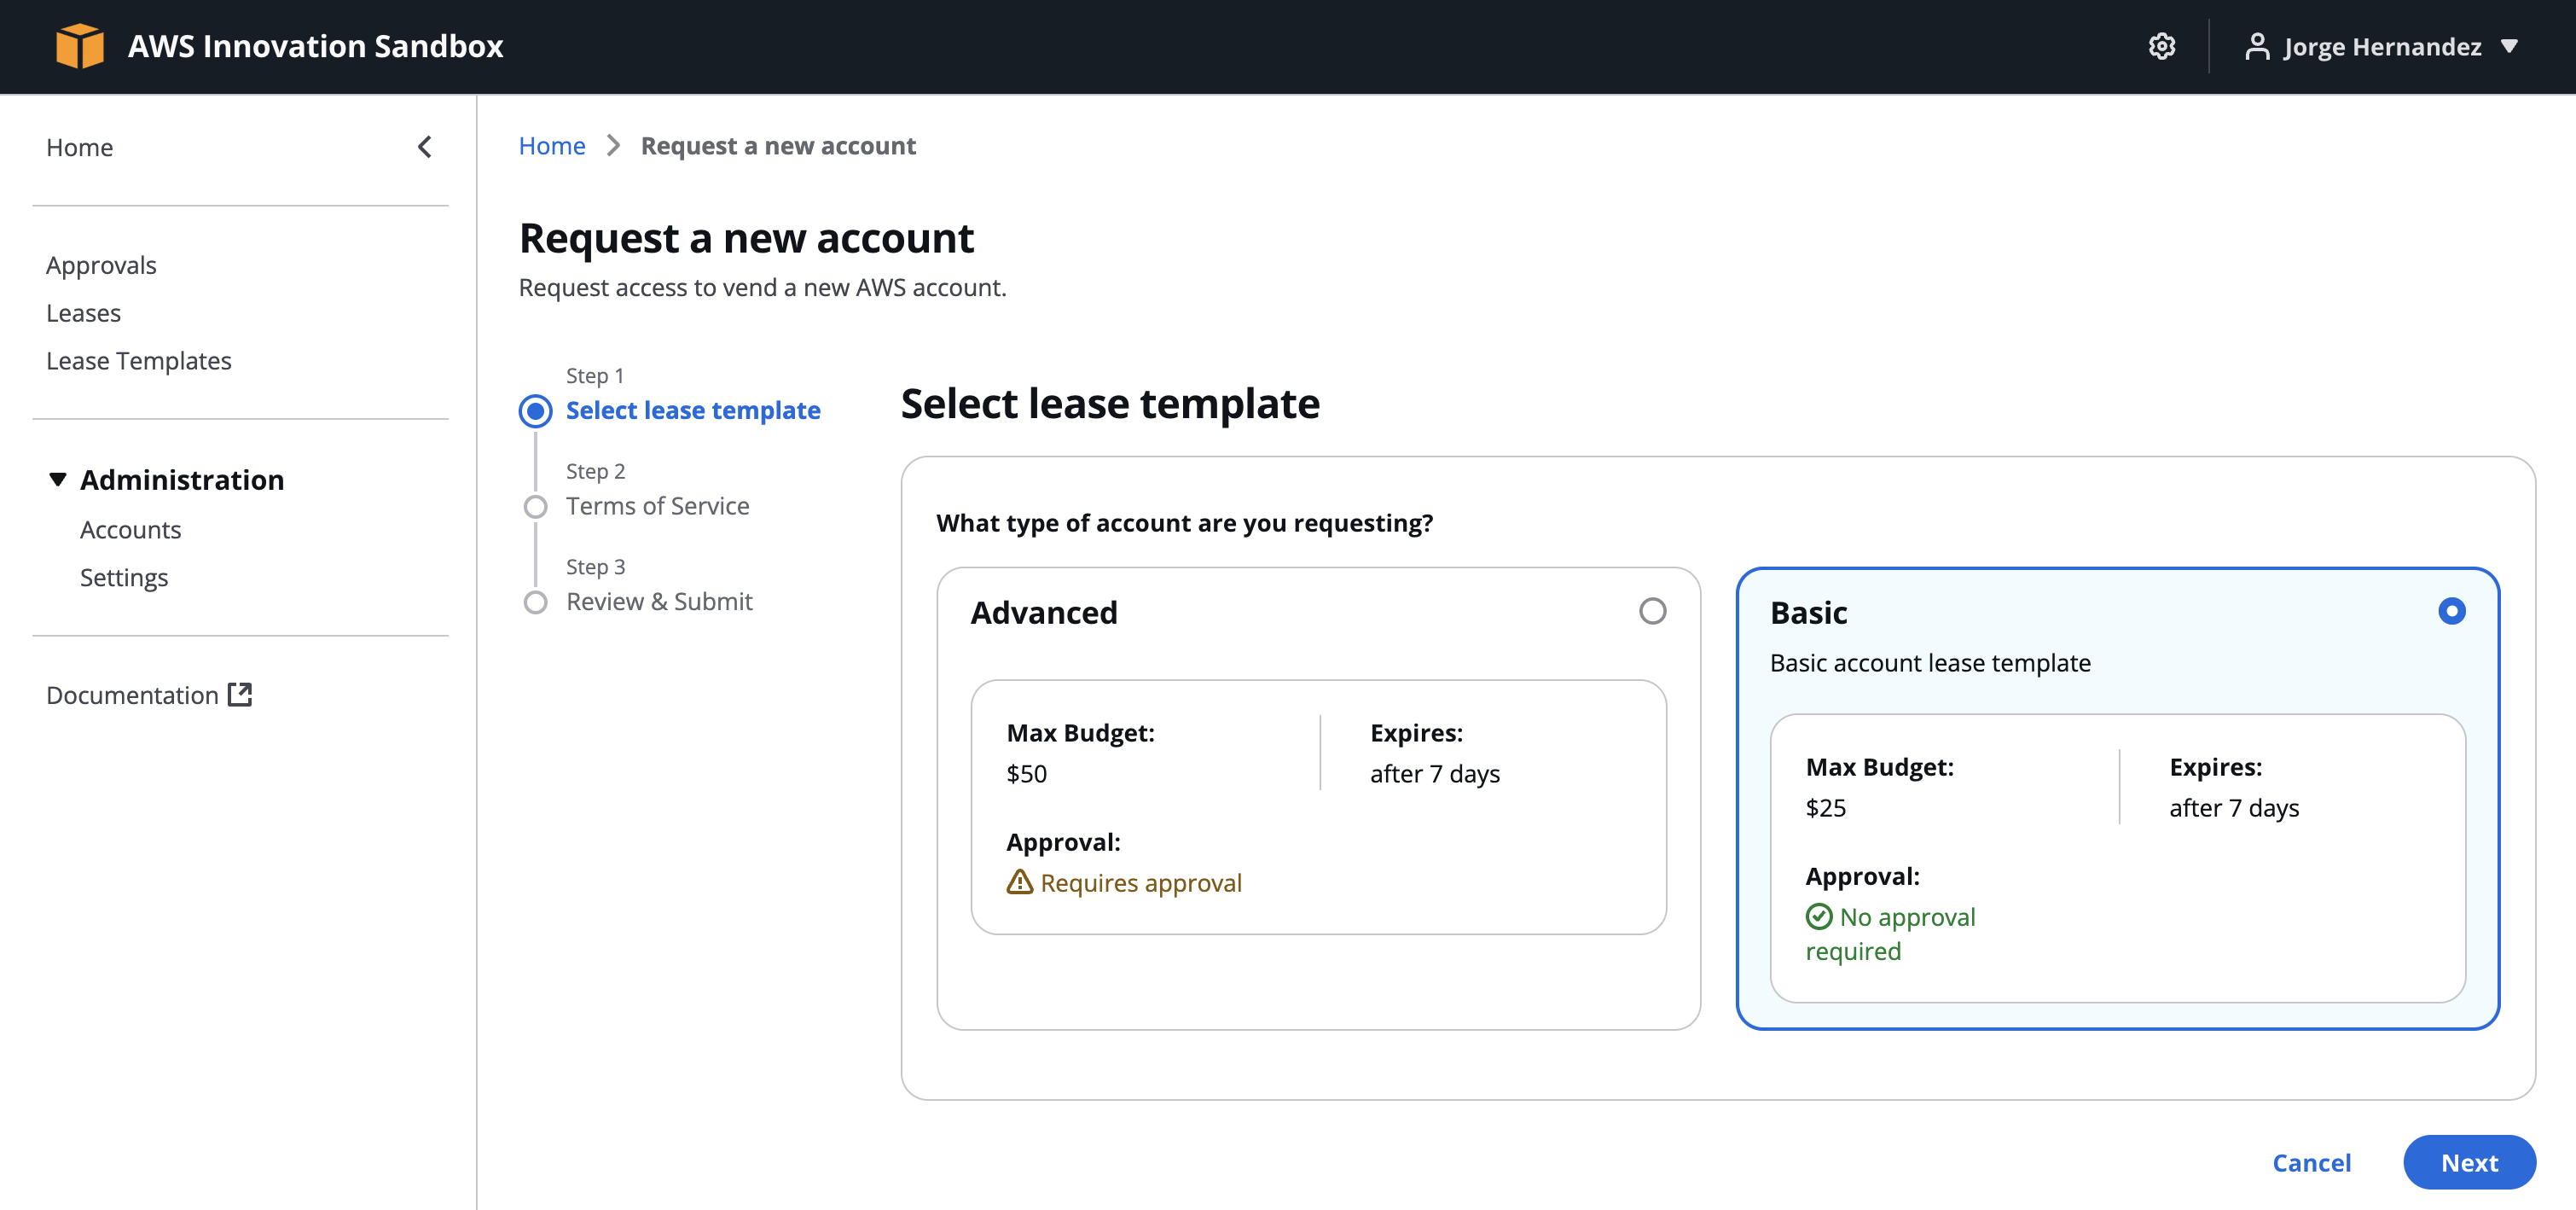
- Comments: enter a reason (e.g.,
Request for a basic account) - Submit
- In the left navigation bar, select Home. In the Account section, click Refresh to update.

- When the account is granted, in the Access section, select Login to account
- Select a role in Select a role to enter the AWS Management Console.

2. Testing SCP limits
Check if the SCP is working by trying to create a forbidden EC2 instance.
Steps:
- In the AWS Management Console, search for EC2
- In the left navigation bar, select Instances
- Launch instances
- Name:
test-scp. Keep the default AMI.
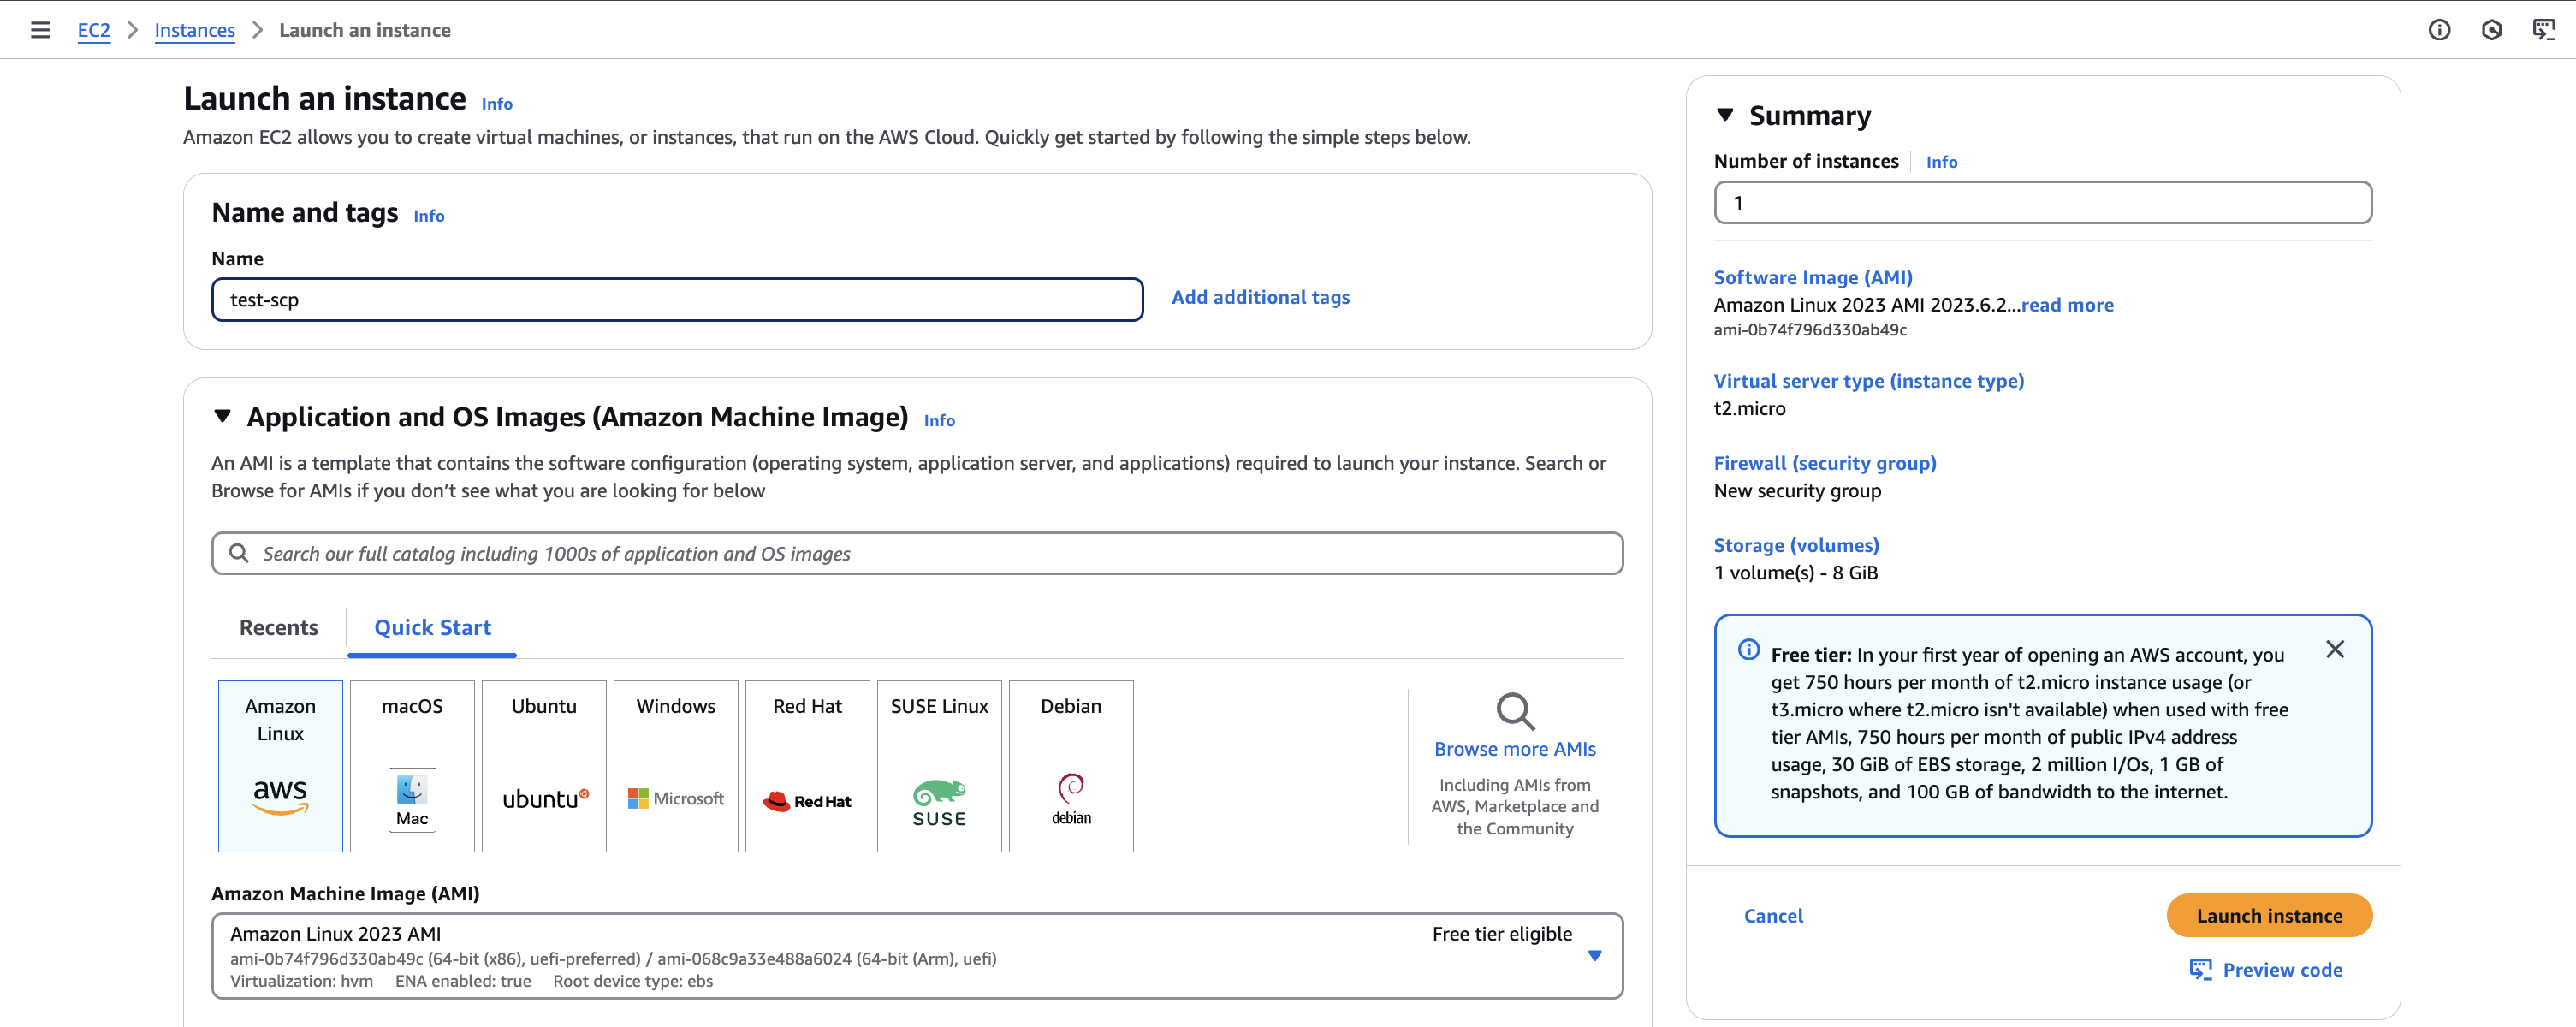
- Instance type: select m5.large (this type is blocked by the SCP)
- Key pair: Proceed without a key pair
- Keep the other settings, Launch instance
- You will see an error message because the SCP prevents the creation of m5.large.

3. Requesting an advanced account
The advanced account requires manager approval.
Steps:
- Go back to the Innovation Sandbox interface, log in as an end user
- Request a new account
- Select Advanced lease template, Next
- Check I accept the above terms of service, Next
- Comments: enter a reason (e.g.,
Request for an advanced account) - Submit
Approval process:
- Log out, log in with the manager account
- The homepage will show a pending request. In the navigation bar, select Approvals.
- Select the request, Actions > Approve request
Managing leases:
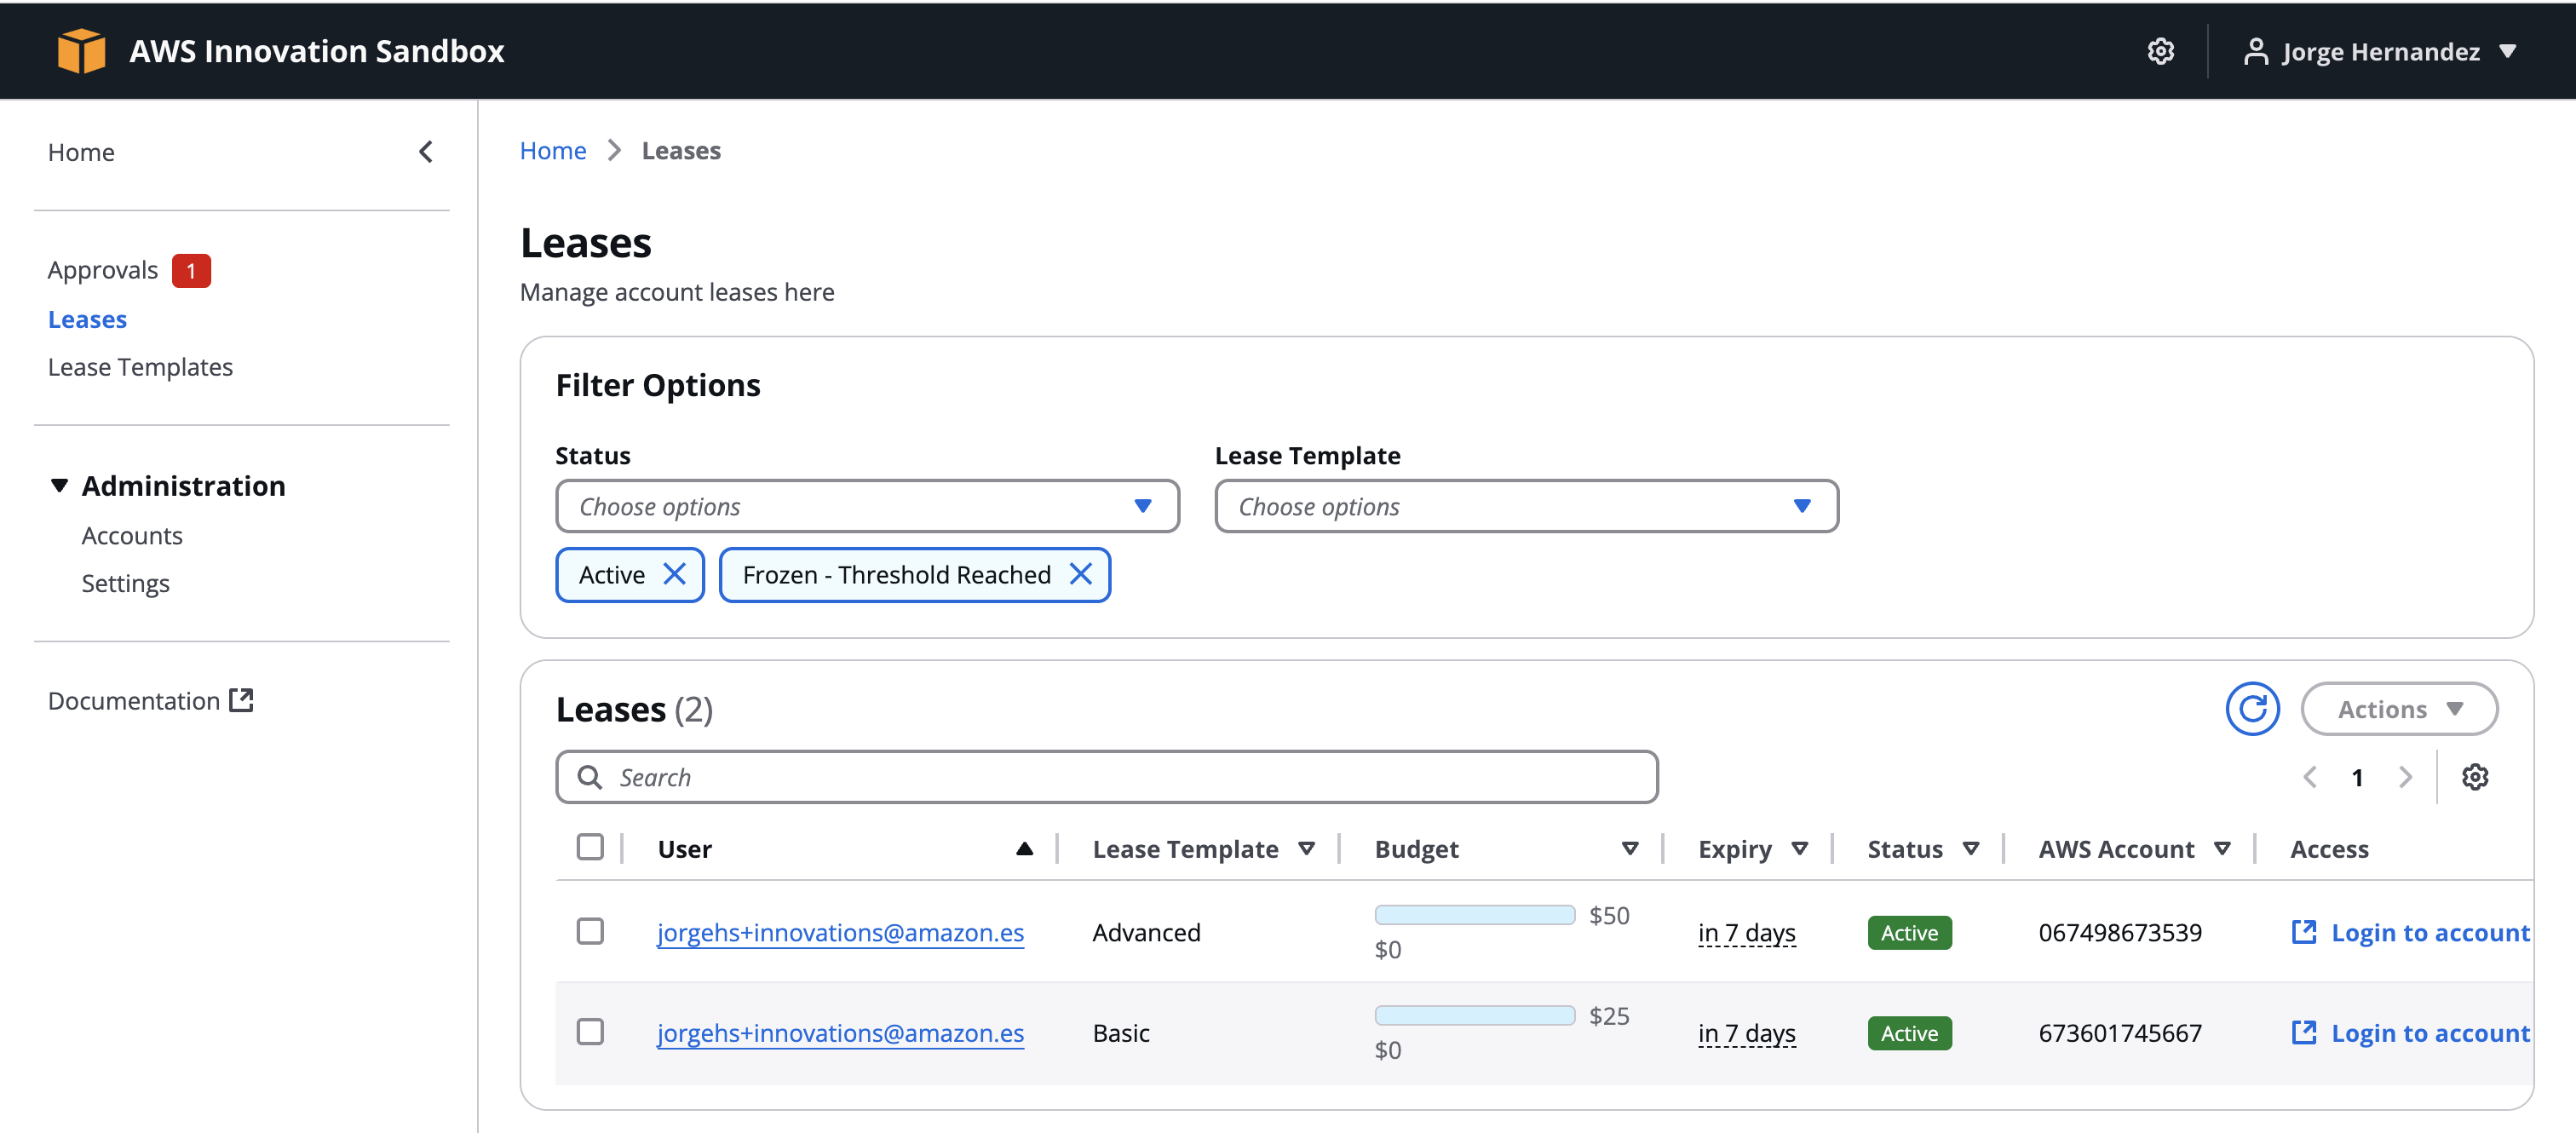
- In the navigation bar, select Leases
- You will see two leases: basic and advanced
- You can select a lease and use Actions to terminate, suspend, or update it.

4. Summary
- Administrator: Sets up the system, creates SCPs to control resources, manages accounts, integrates AppConfig
- Manager: Configures budgets, creates lease templates (Basic, Advanced), sets up approval processes, monitors usage
- End user: Requests and accesses AWS accounts, tests SCPs, uses different account types with approval processes
That’s it, you now know how to use the Innovation Sandbox with all three roles!